Getting started
Switch to YourBooks in an afternoon
What to have ready, how the setup screens work, how to bring your balances across and how to record your first transactions.
Before you switch
Pick a switch-over date, usually a month end, and gather the following. Everything after that date is recorded in YourBooks.
Company details
- Company and legal name
- Home country
- Base currency. It cannot be changed later, so choose the currency you report in
- Whether you are VAT registered
Balances at your switch-over date
- A trial balance from your old system at the switch-over date
- Your main bank account number and its balance on that date
- Unpaid customer invoices and supplier bills
Lists you will enter
- Customers and suppliers
- Products and services you sell or buy
- For stock-holding businesses: quantities and costs on hand, by warehouse
Files you can import
- A recent bank statement as a CSV, OFX or QFX file, to import and reconcile
Set up your company
Create your account
Enter your name, email address and a password. You go straight into the setup screens, and your 30-day free trial starts with no card required.
Company details and base currency
Enter the company name, legal name, home country and base currency, and whether you are VAT registered. Because the base currency is permanent, the screen asks you to confirm it before you continue.
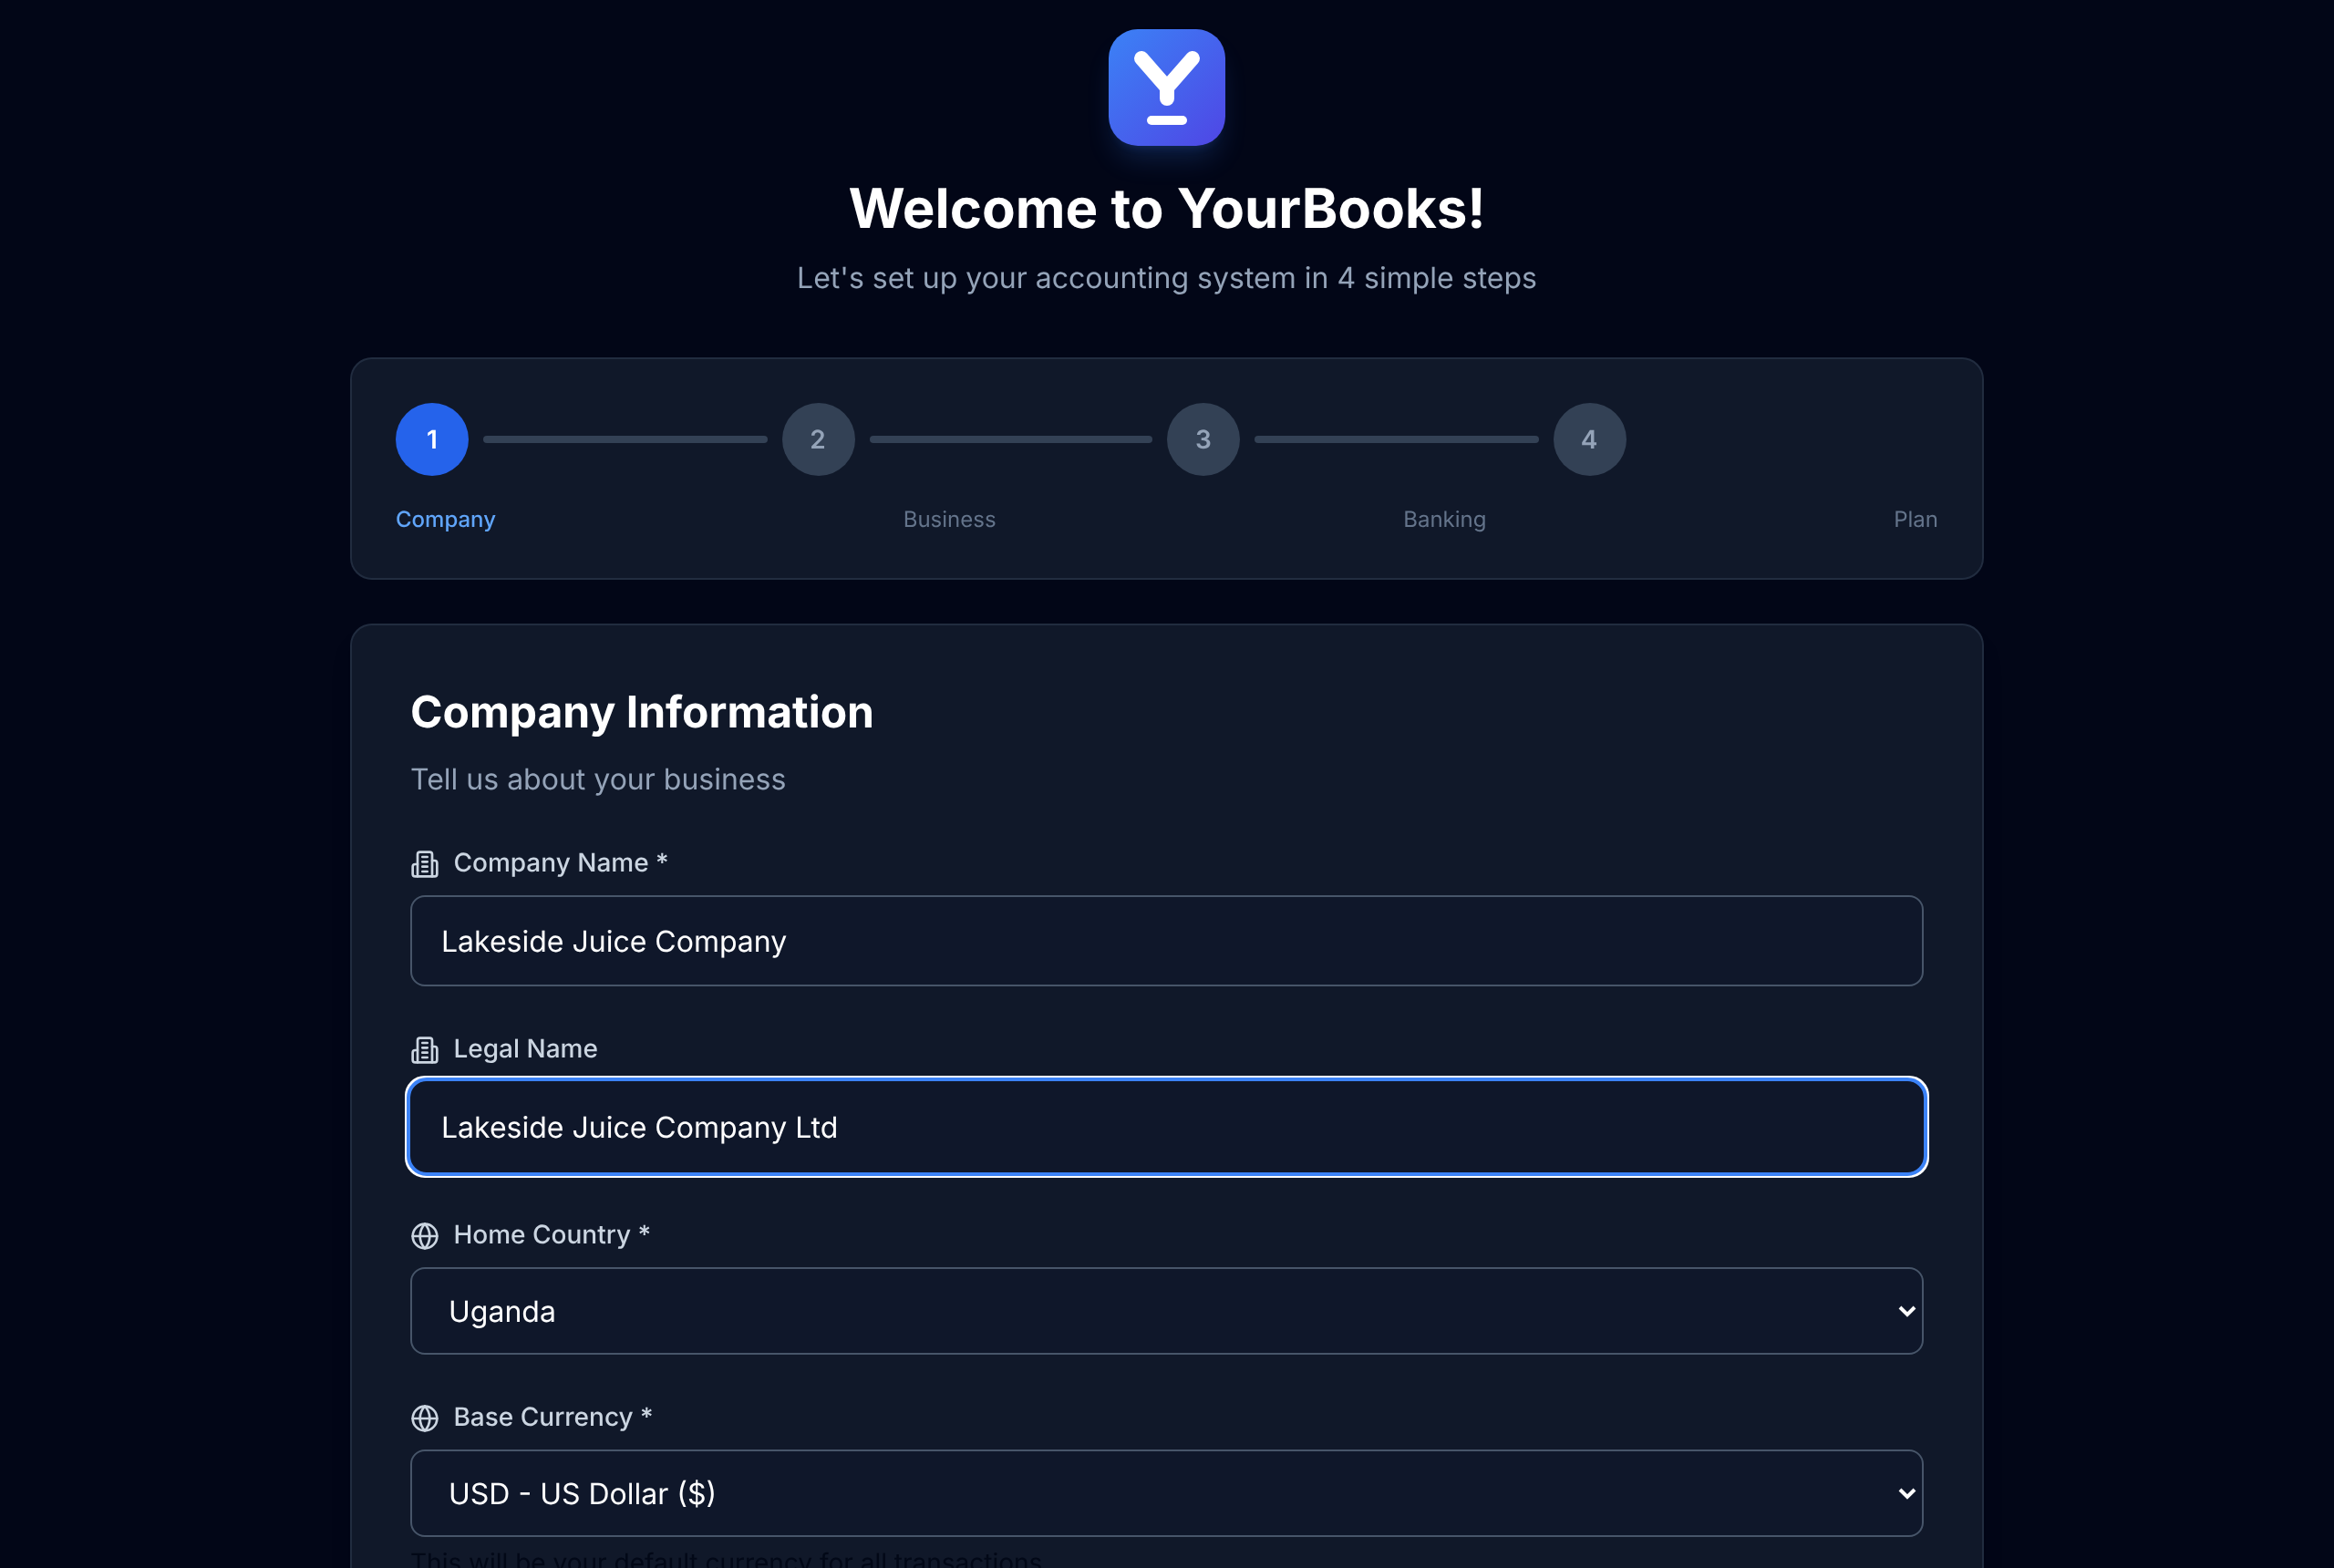
Step 1 of the setup: company details, home country and base currency. Type of business
Pick the type of business you run, such as services, retail or manufacturing. YourBooks sets up a chart of accounts to match, which you can extend later.
Your first bank account
Enter the bank name, account number and the balance on your switch-over date. The account is ready for payments and statement imports as soon as setup finishes.
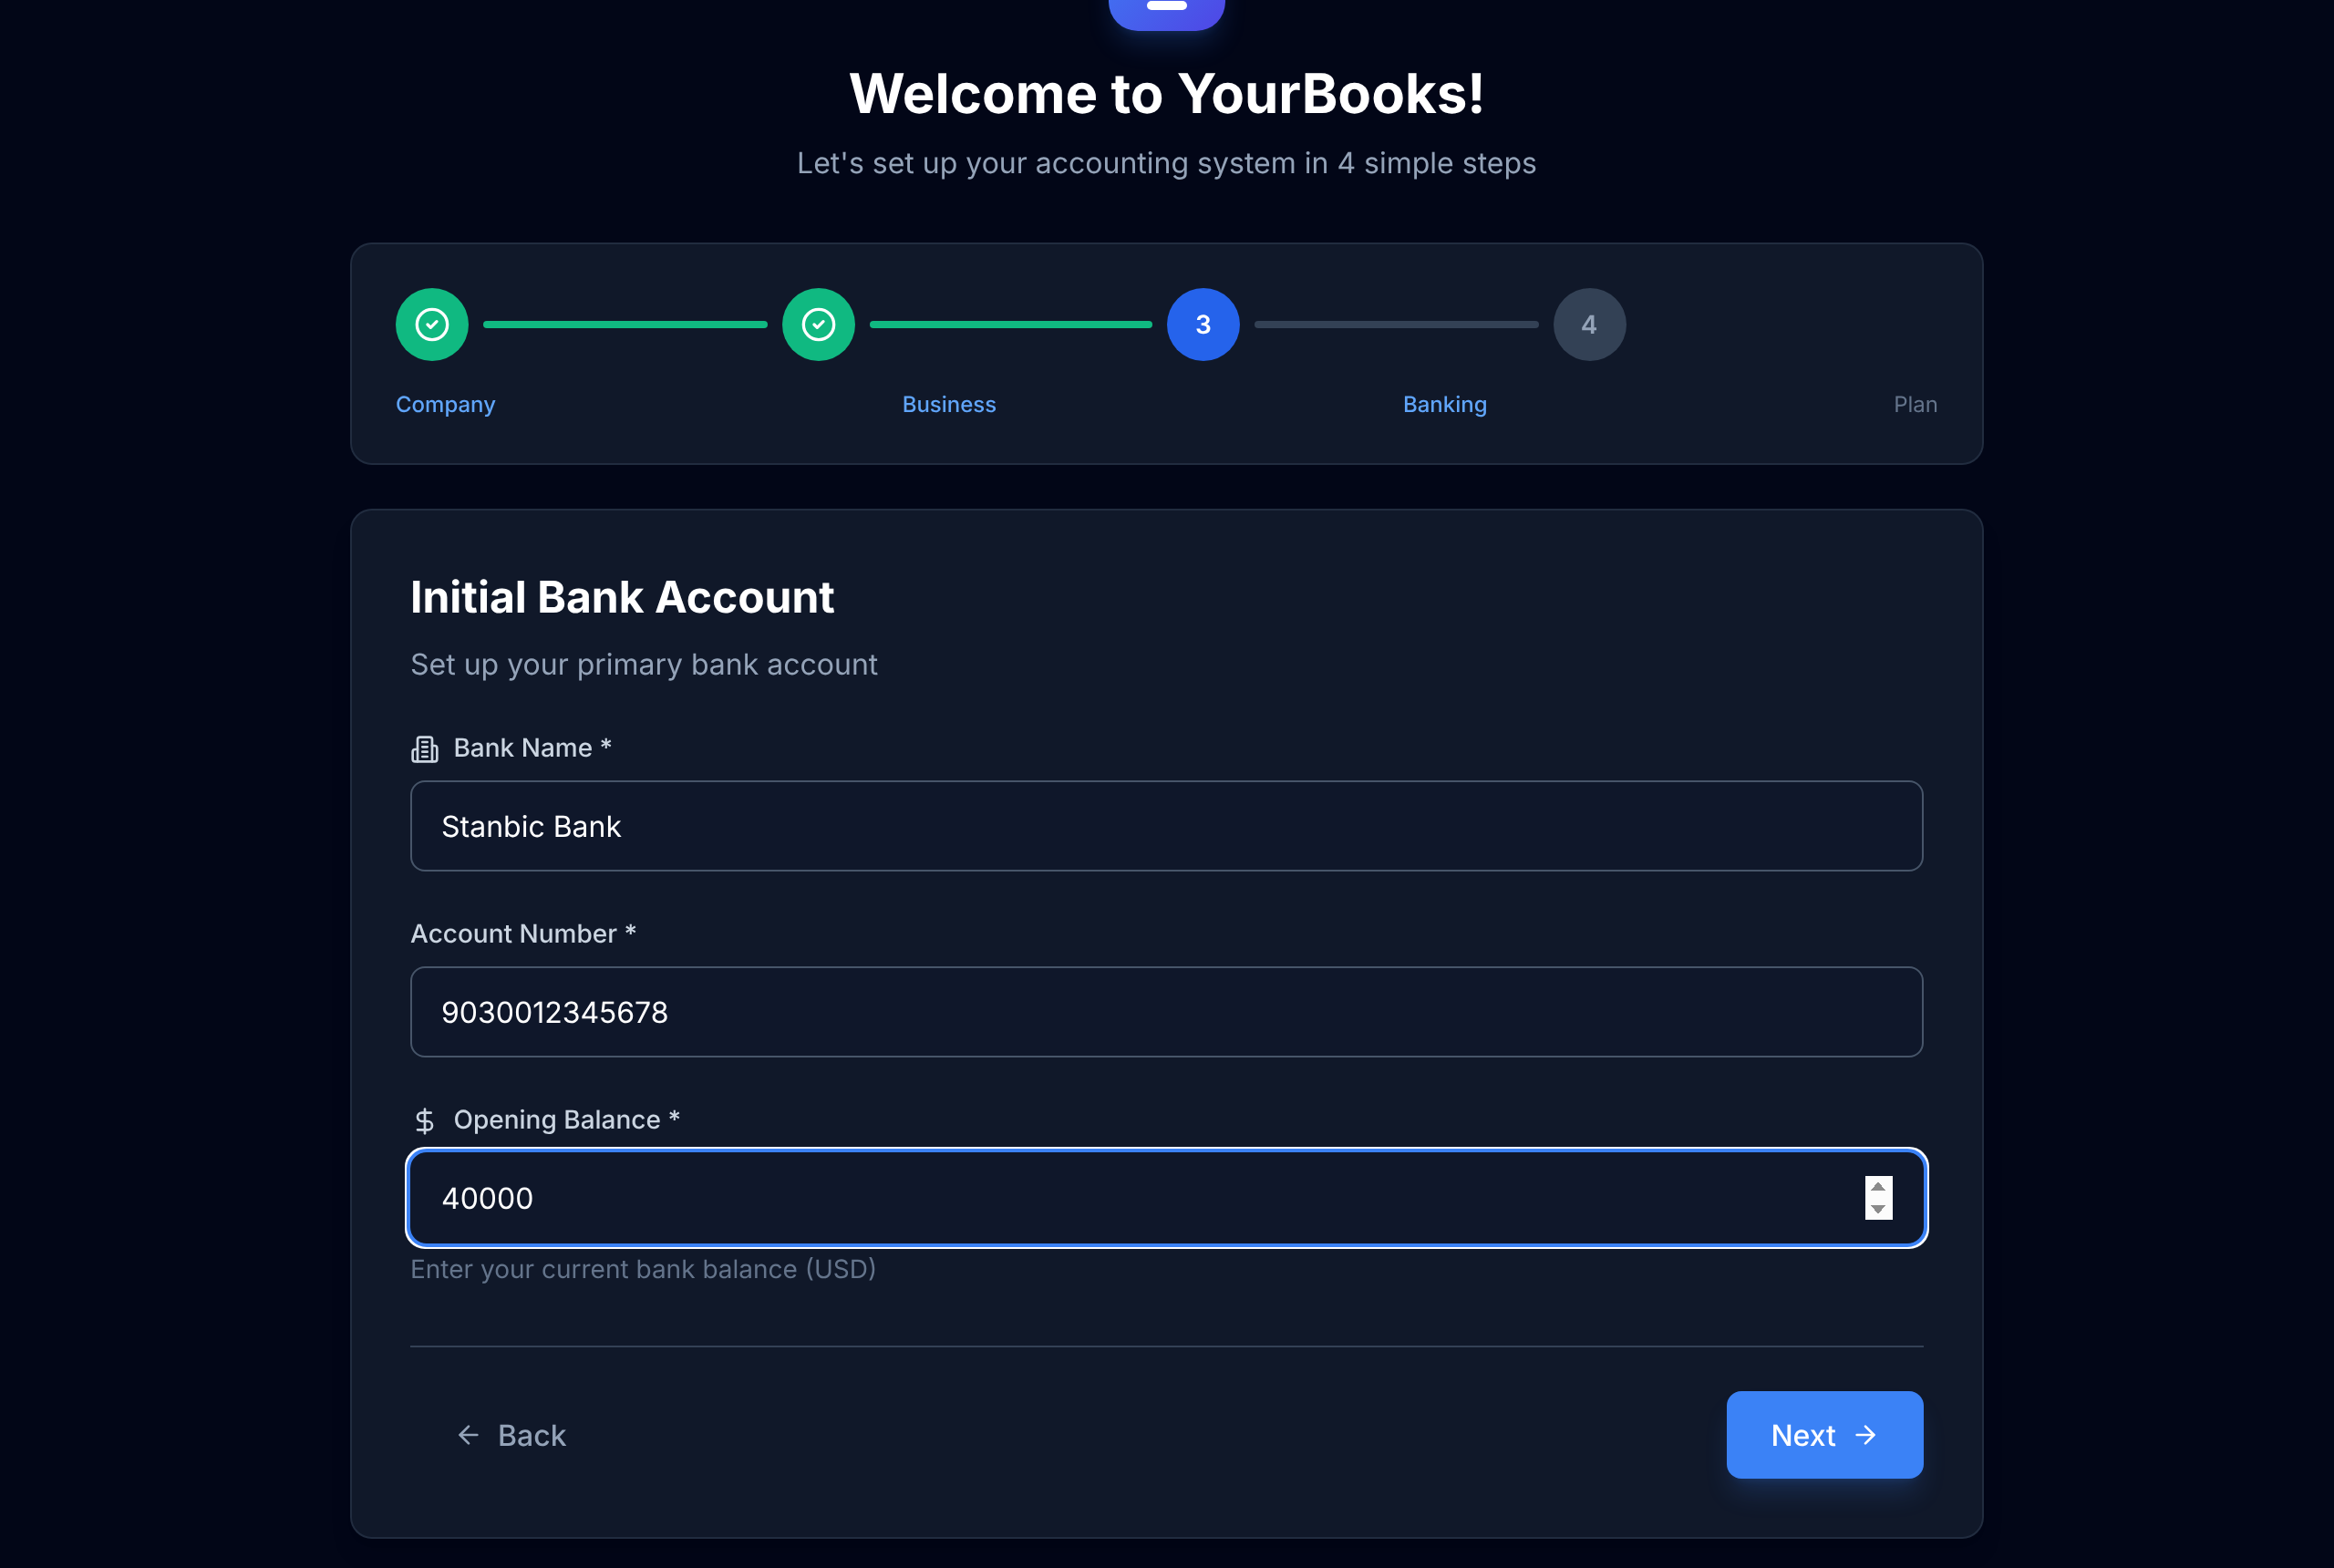
Step 3: the first bank account and its opening balance. Review the editions and open the dashboard
The last screen shows when your free trial ends and what each edition costs. Start the trial and you are taken to your company's dashboard.
Invite your team
In Settings → Users & Access, enter a colleague’s email address and choose their role, such as Accountant, Sales or Warehouse. They get a link to create their account, or to sign in if they already have one, and join your company with that role. Links work once and expire after 7 days; admins can resend or withdraw them.
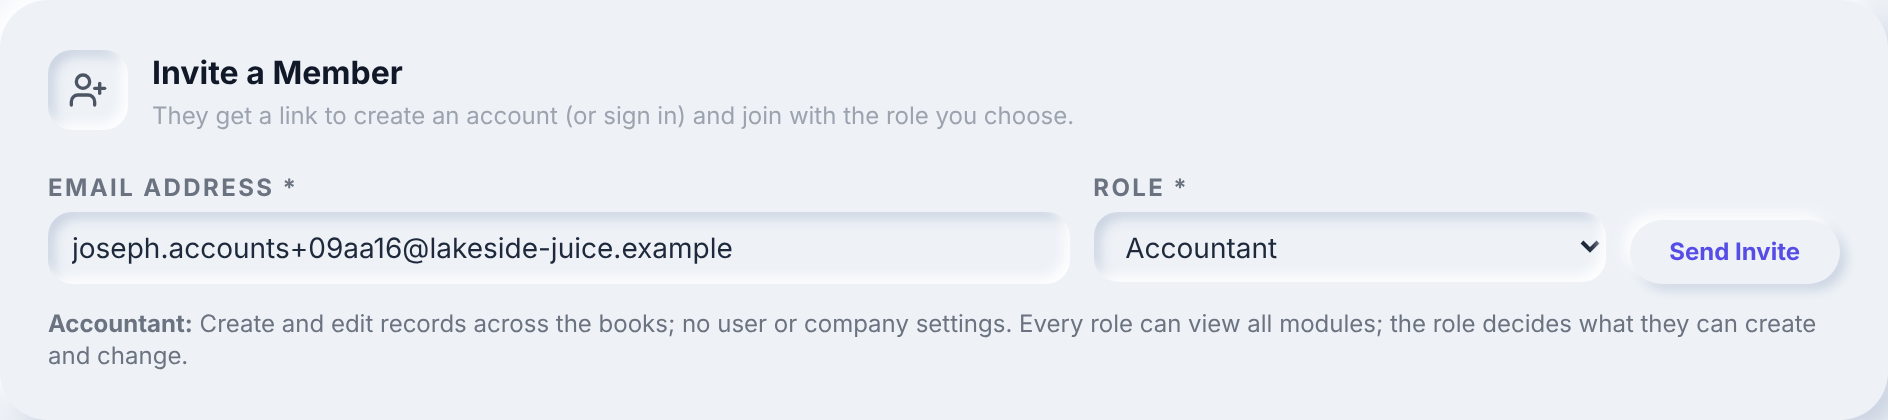
Inviting a colleague as Accountant: the form explains what each role can do.
Bring your opening balances across
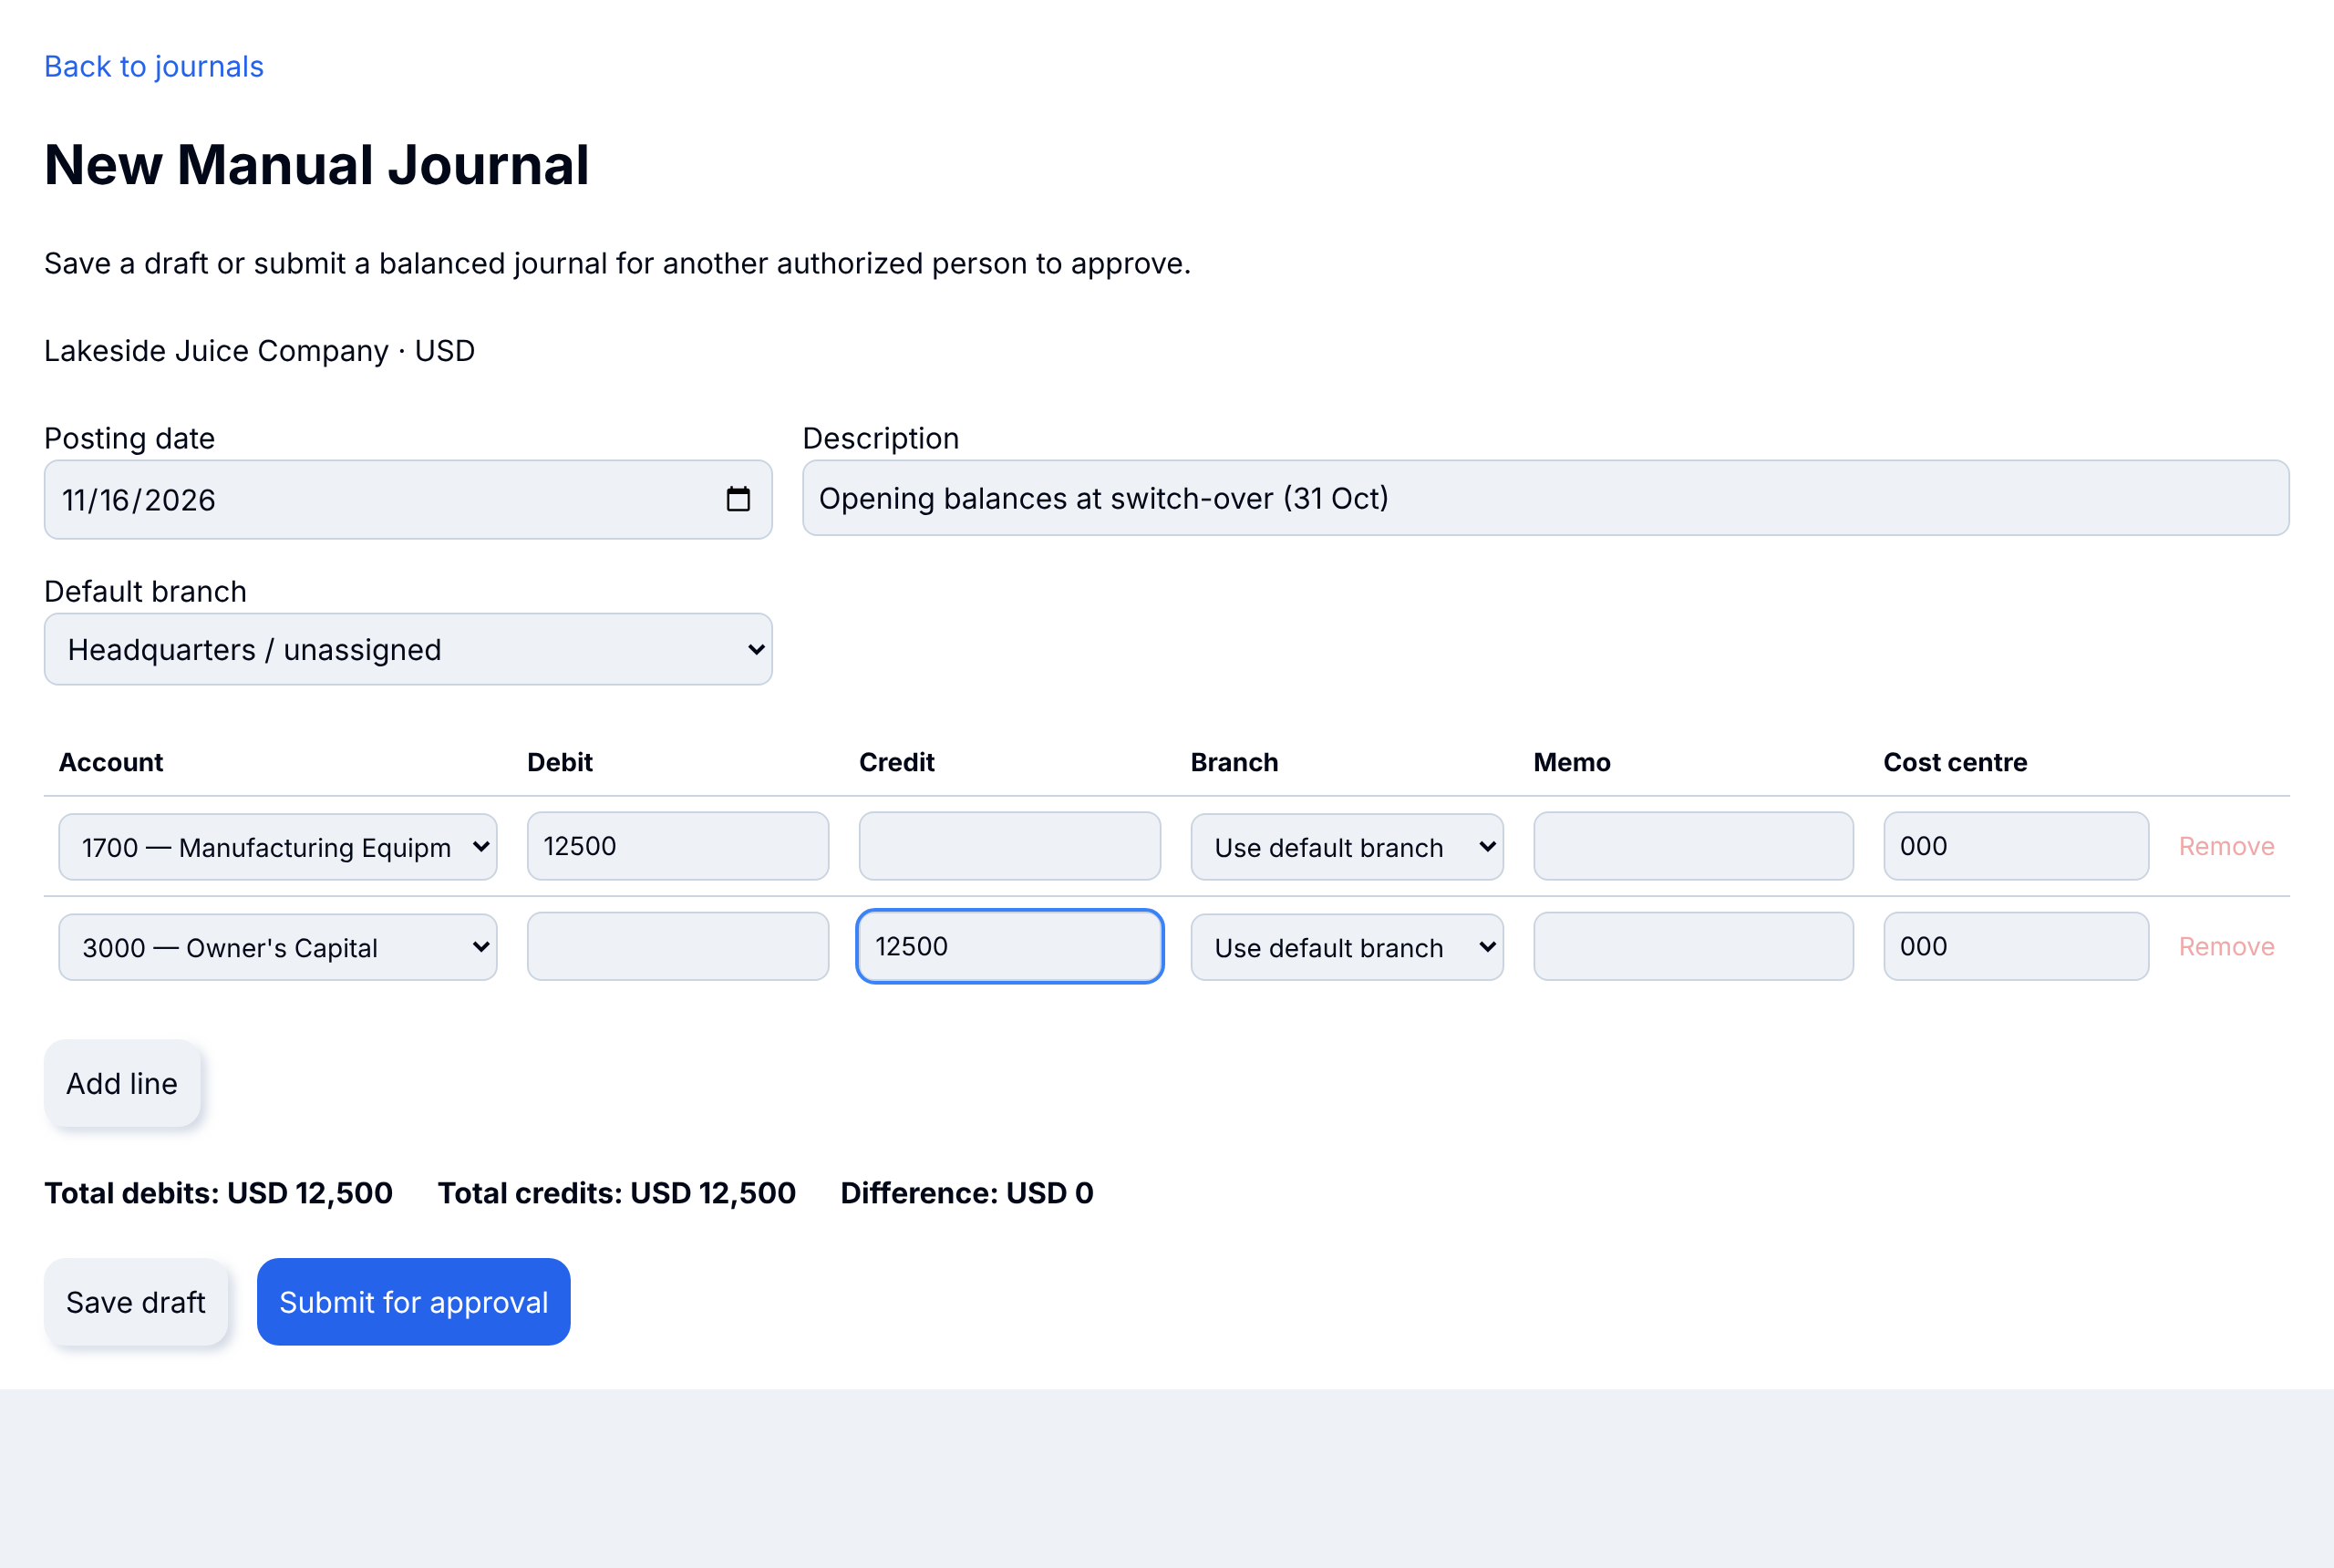
Your bank balance is already in from setup. Enter the rest of your trial balance as a manual journal dated on your switch-over date: assets as debits, liabilities and equity as credits. The journal must balance before it can be saved. Save it as a draft while you check it, then submit it for approval.
Record your first transactions
Raise an invoice
Add the customer and the products or services you sold, and issue the invoice. It posts to accounts receivable and revenue.
Record the payment
When the customer pays, record the payment against the invoice into your bank account.
Import your bank statement
On the Bank Feeds screen, import the statement file. Each line lands in the transaction inbox to be matched.
Match and reconcile
Match the received payment to the statement line, record bank fees, and reconcile the account to a zero difference.
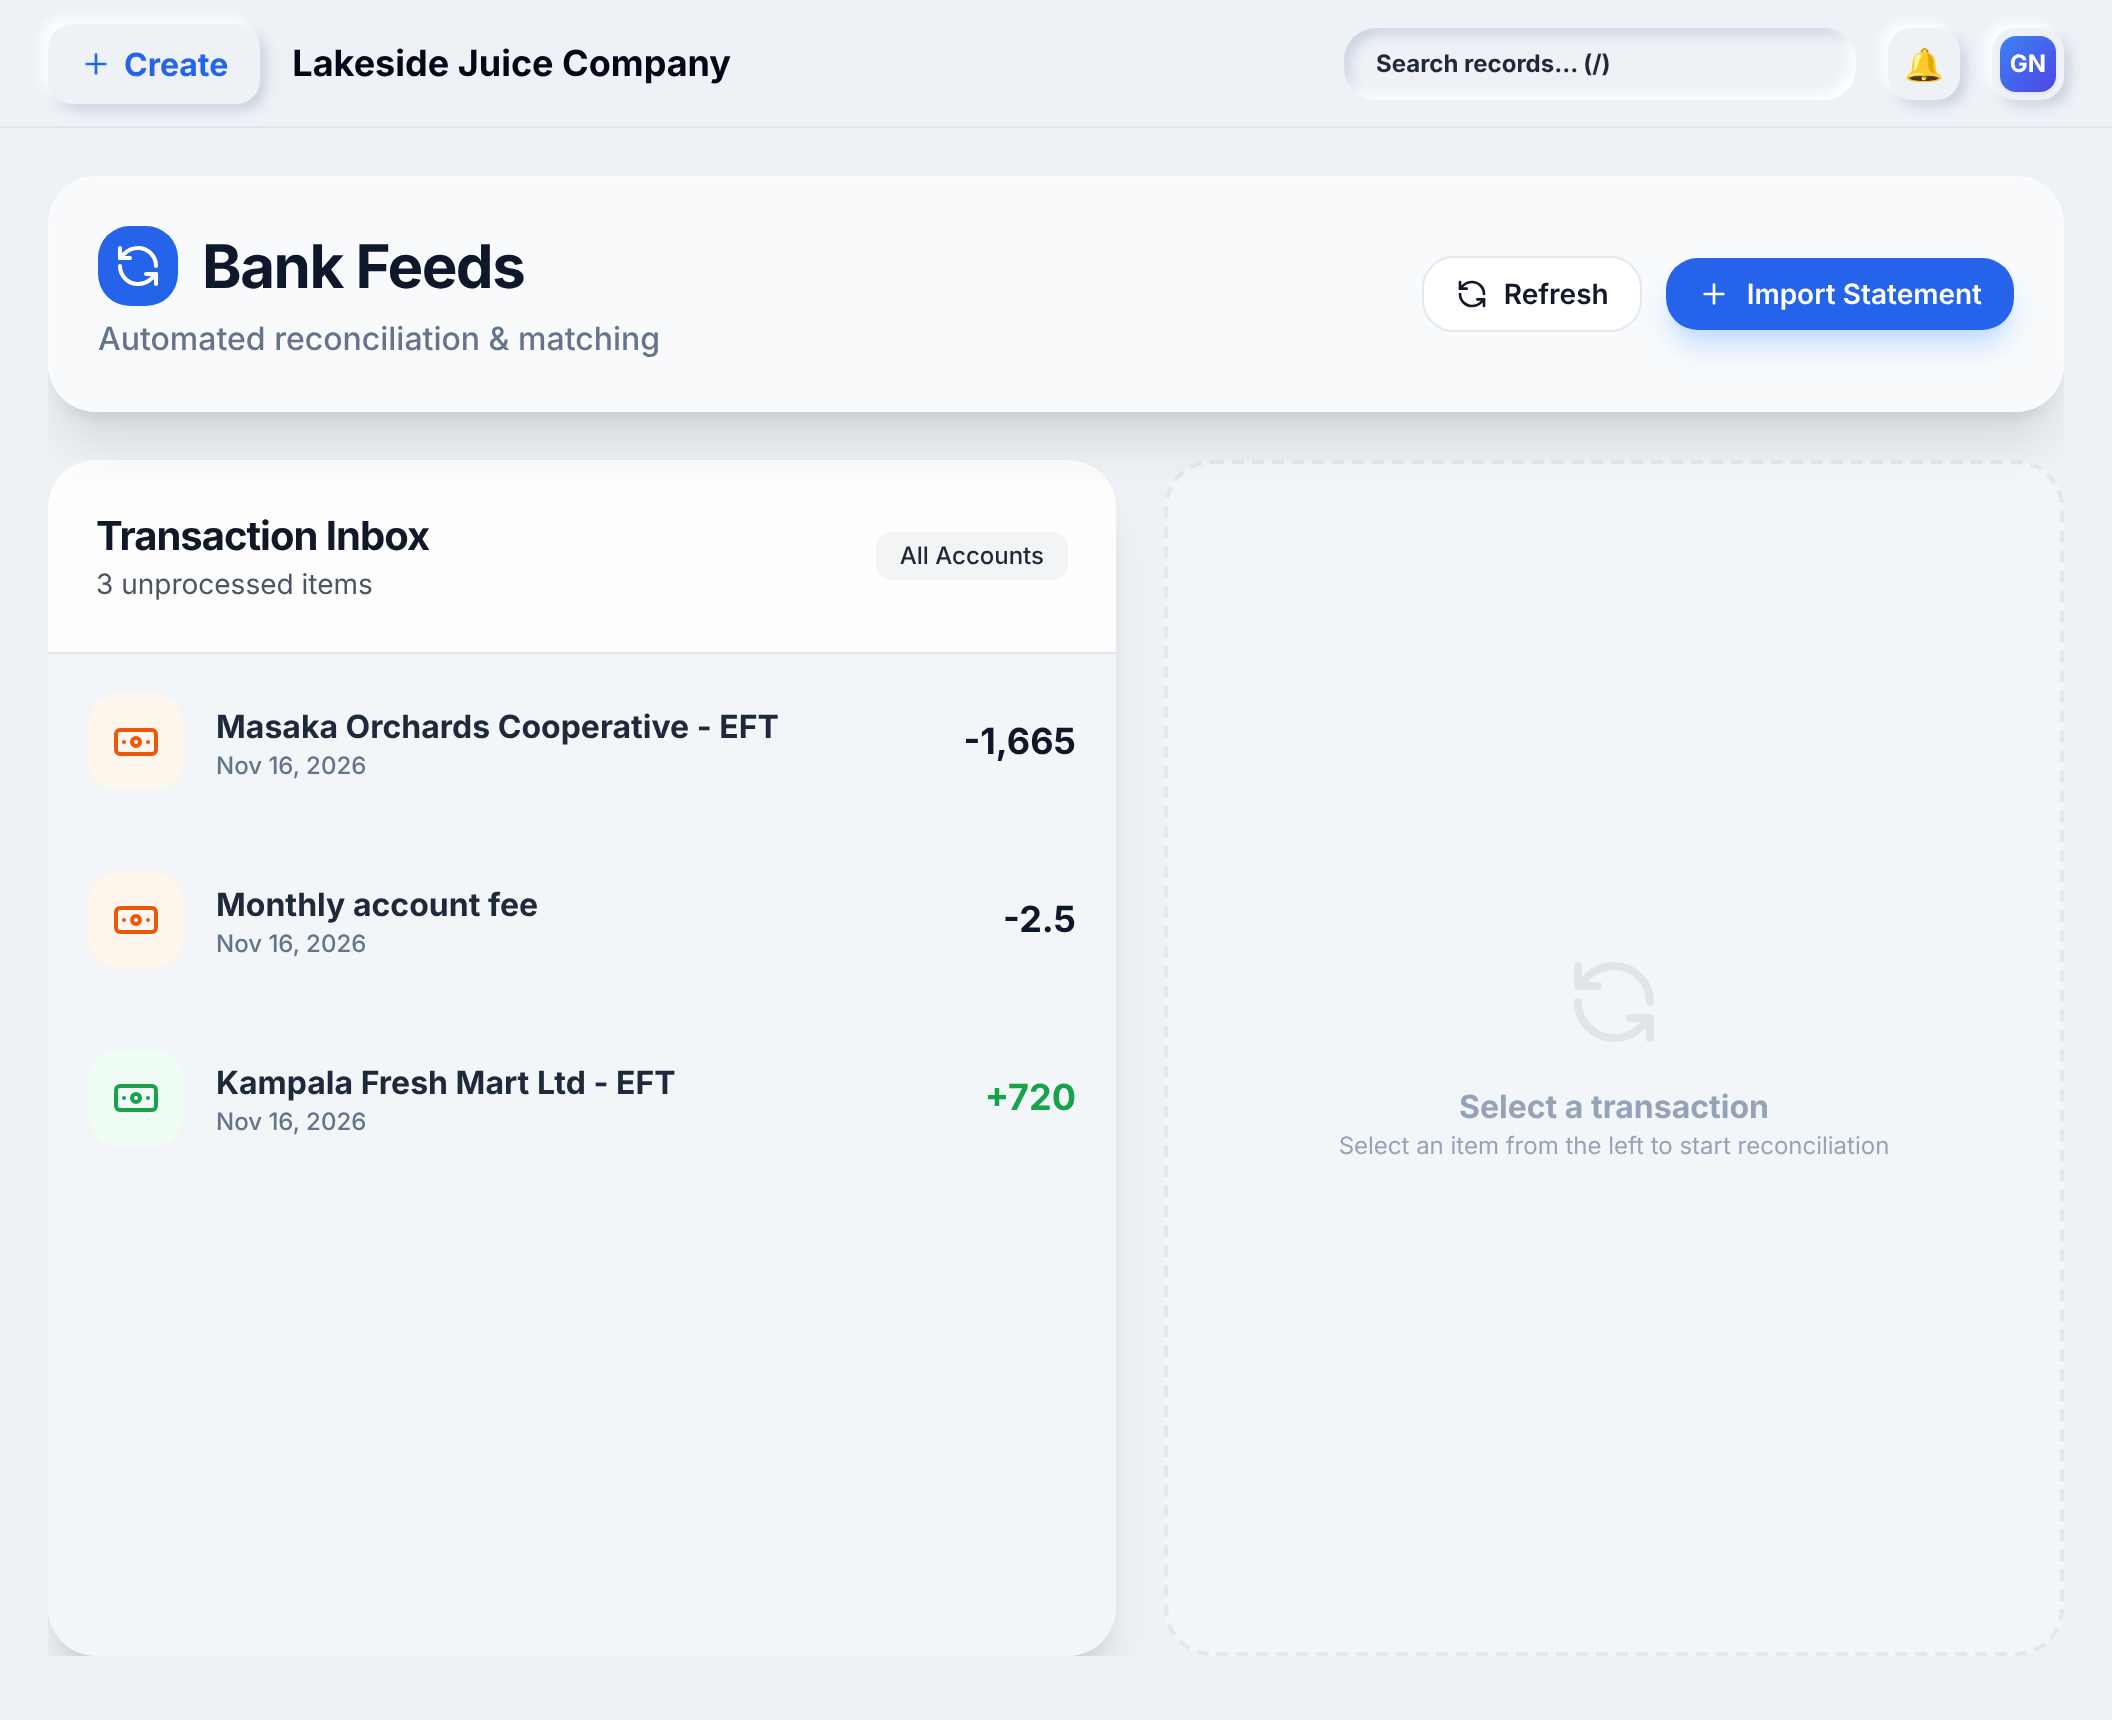
The Accounting page follows this example through to the Profit & Loss.
What can be imported
Bank statements are the only file import today. Everything else is entered in the app.
| Data | File import | How it gets in |
|---|---|---|
| Bank statements | Yes | Import CSV, OFX or QFX files on the Bank Feeds screen, then match and reconcile the lines. |
| Opening balances | No | Enter as a manual journal at your switch-over date. |
| Chart of accounts | No | Created for you from your business type; add or rename accounts in the app. |
| Customers and suppliers | No | Enter in the app. |
| Products and services | No | Enter in the app. |
| Unpaid invoices and bills | No | Enter in the app, or include the totals in your opening balance journal. |
Ready to set up?
Start the free trial and follow the steps above, or book a demo and we will walk through your switch-over with you.
Questions about pricing or the trial? See the FAQ.